ShopDreamUp AI ArtDreamUp
Deviation Actions

This is also a rebloggable Tumblr Post!
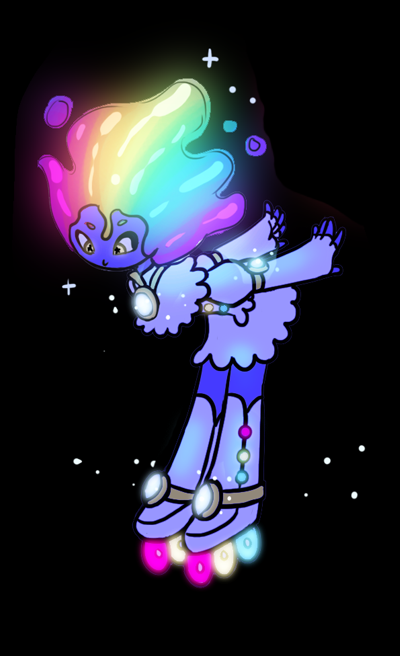
A lot of people were asking me how I did the glowing/neon light effects on my last drawing. It's actually extremely easy, and it looks great with shapes or text.
The key to this effect is contrast. Your background and overall image must be pretty dark for it to be effective. You know how you can't see a flashlight in broad daylight? The same applies here.
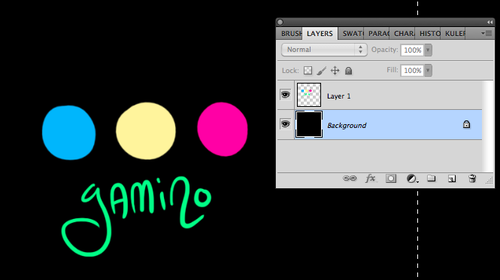
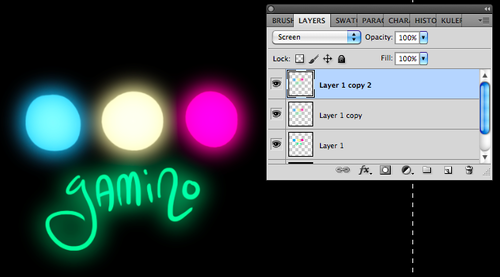
Step one, make a new document, and invert the default black background (command + i) or manually fill it with black. Then make A NEW LAYER. This is the layer containing the colors you want to glow.
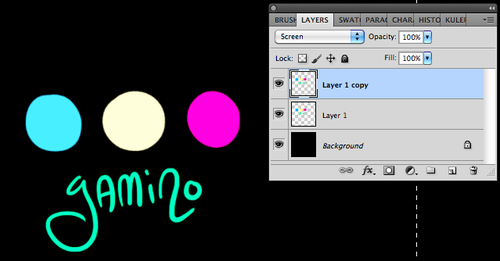
Now duplicate the layer you just made with the colors. Set the layer style to "screen." Screen applies the layer to make everything below it lighter. (It's the opposite of the "Multiply" setting.)
Now apply a "Gaussian Blur" filter to that layer. You can toy with the exact amount of blur to see what looks best.
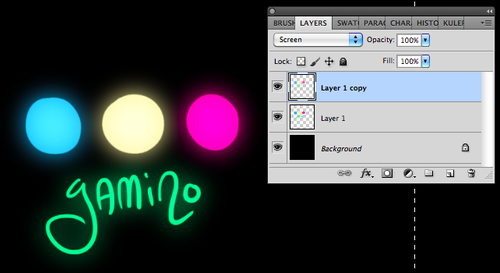
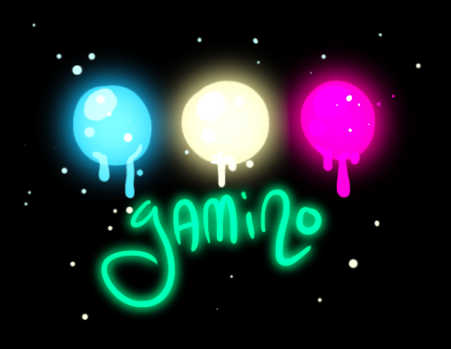
Sometimes that's now quite glowy enough. In that case, you can duplicate the layer to double the effect.
I also like adding extra shine and sparkles on top in another layer.
Extra note: If you have anything in the picture you DON'T want to glow, you should put a shadow layer over it. Just the plain drawing with glow effects looks like this:
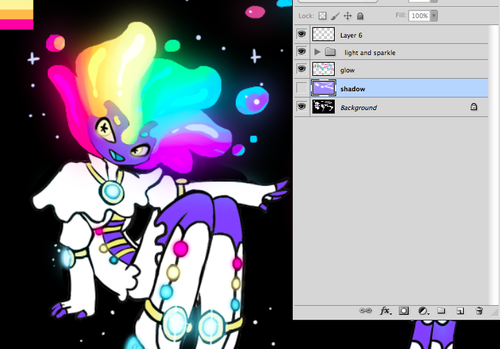
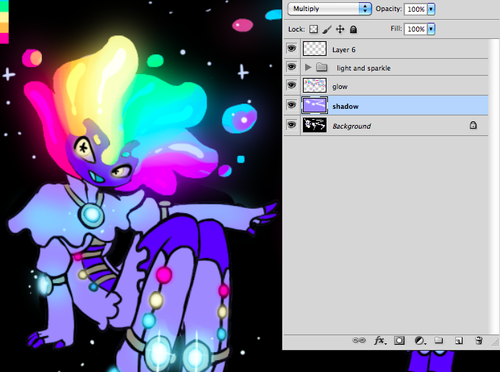
Add a little shadow layer set to "Multiply" over the main image but underneath the glowing effects for a more realistic and eye-popping contrast.
A lot of people were asking me how I did the glowing/neon light effects on my last drawing. It's actually extremely easy, and it looks great with shapes or text.
The key to this effect is contrast. Your background and overall image must be pretty dark for it to be effective. You know how you can't see a flashlight in broad daylight? The same applies here.
Step one, make a new document, and invert the default black background (command + i) or manually fill it with black. Then make A NEW LAYER. This is the layer containing the colors you want to glow.
Now duplicate the layer you just made with the colors. Set the layer style to "screen." Screen applies the layer to make everything below it lighter. (It's the opposite of the "Multiply" setting.)
Now apply a "Gaussian Blur" filter to that layer. You can toy with the exact amount of blur to see what looks best.
Sometimes that's now quite glowy enough. In that case, you can duplicate the layer to double the effect.
I also like adding extra shine and sparkles on top in another layer.
Extra note: If you have anything in the picture you DON'T want to glow, you should put a shadow layer over it. Just the plain drawing with glow effects looks like this:
Add a little shadow layer set to "Multiply" over the main image but underneath the glowing effects for a more realistic and eye-popping contrast.
Finally... I'm open for commission!
Hey all, due to popular demand, I'm finally taking online commissions! https://commiss.io/yamino
Slots are very limited, so snag 'em while you can! <3
Lillie and Cosmog Watercolor for sale!
Hey all! I’ve got some original art for sale: a watercolor painting of Lillie and Cosmog from Pokemon Sun/Moon!
Check it out here: https://www.ebay.com/itm/Original-Watercolor-Lillie-and-Cosmog-from-Pokemon-Sun-Moon/152774154649
July Wallpaper available!
The July wallpaper is available (early!!) for $5+ Patrons! https://www.patreon.com/posts/12329116
Taking Guest Comics!
Hello guys!! We have an announcement to make regarding updates starting July 3rd.
As some of you may know, Elena hasn’t been feeling so well! She’s been battling a pesky sinusitis that won’t go away, so now she has to undertake minor surgery to get that fixed. She’ll be perfectly all right, but we are SKIPPING UPDATES FOR ONE/TWO WEEKS, to allow her to recover.
So there will not be Comic or Missing Moments updates for at least a week, possibly two. Hopefully, Elena will be feeling better by then! And after that we’ll return as regular.
BUT!! We’re not leaving you guys just hanging ;)
We’ll be taking
© 2012 - 2024 Yamino
Comments19
Join the community to add your comment. Already a deviant? Log In
thank you!